参考网站:GPU-Accelerated LLM on a $100 Orange Pi、Orange Pi 5 (RK3588 based SBC)
资料来源:Github——mlc-llm
相关论坛:Reddit——GPU-Accelerated LLM on a $100 Orange Pi
1 Prepare
1.1 Installation
- Download and istall the Ubuntu 22.04 for your board from here(pick “Orange Pi 5 Plus”)
(:ps 在这个版本里,我无法使用串口,apt update会出现无法解析域名等问题,于是最后用了香橙派官方的系统——1.0.8_ubuntu_jammy_desktop_xfce_linux5.10.150
- 在烧录前,需要准备一张SD卡(我用的32G),准备烧录软件balenaEtcher
- 如何知道自己是否烧录成功?
- 使用串口CSDN——使用香橙派连接电脑,串口和SSH
- 使用另一个显示屏查看
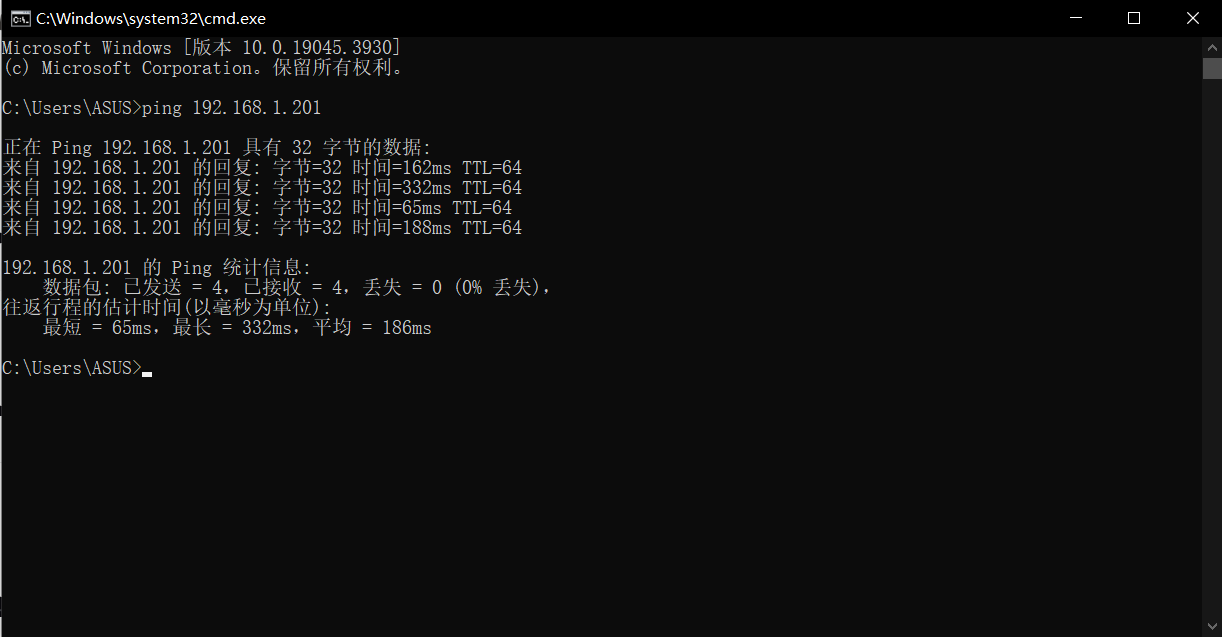
- 烧录成功后,通过上面两种办法知道香橙派的ip地址(如果是用显示屏的,在官方文档里查阅“设置静态IP地址的方法”),我自己的修改为了192.168.1.201,如下图所示,用自己的电脑ping一下香橙派
- 使用vscode连接香橙派CSDN——使用Visual Studio Code远程连接香橙派
- 踩坑点:注意Ubuntu上是否开启了ssh
- 更新软件包
sudo apt update - 下载
open sshsudo apt-get install openssh-server - 下载完成后查看
ssh是否打开
连接成功后会出现下面的图sudo ps -e |grep ssh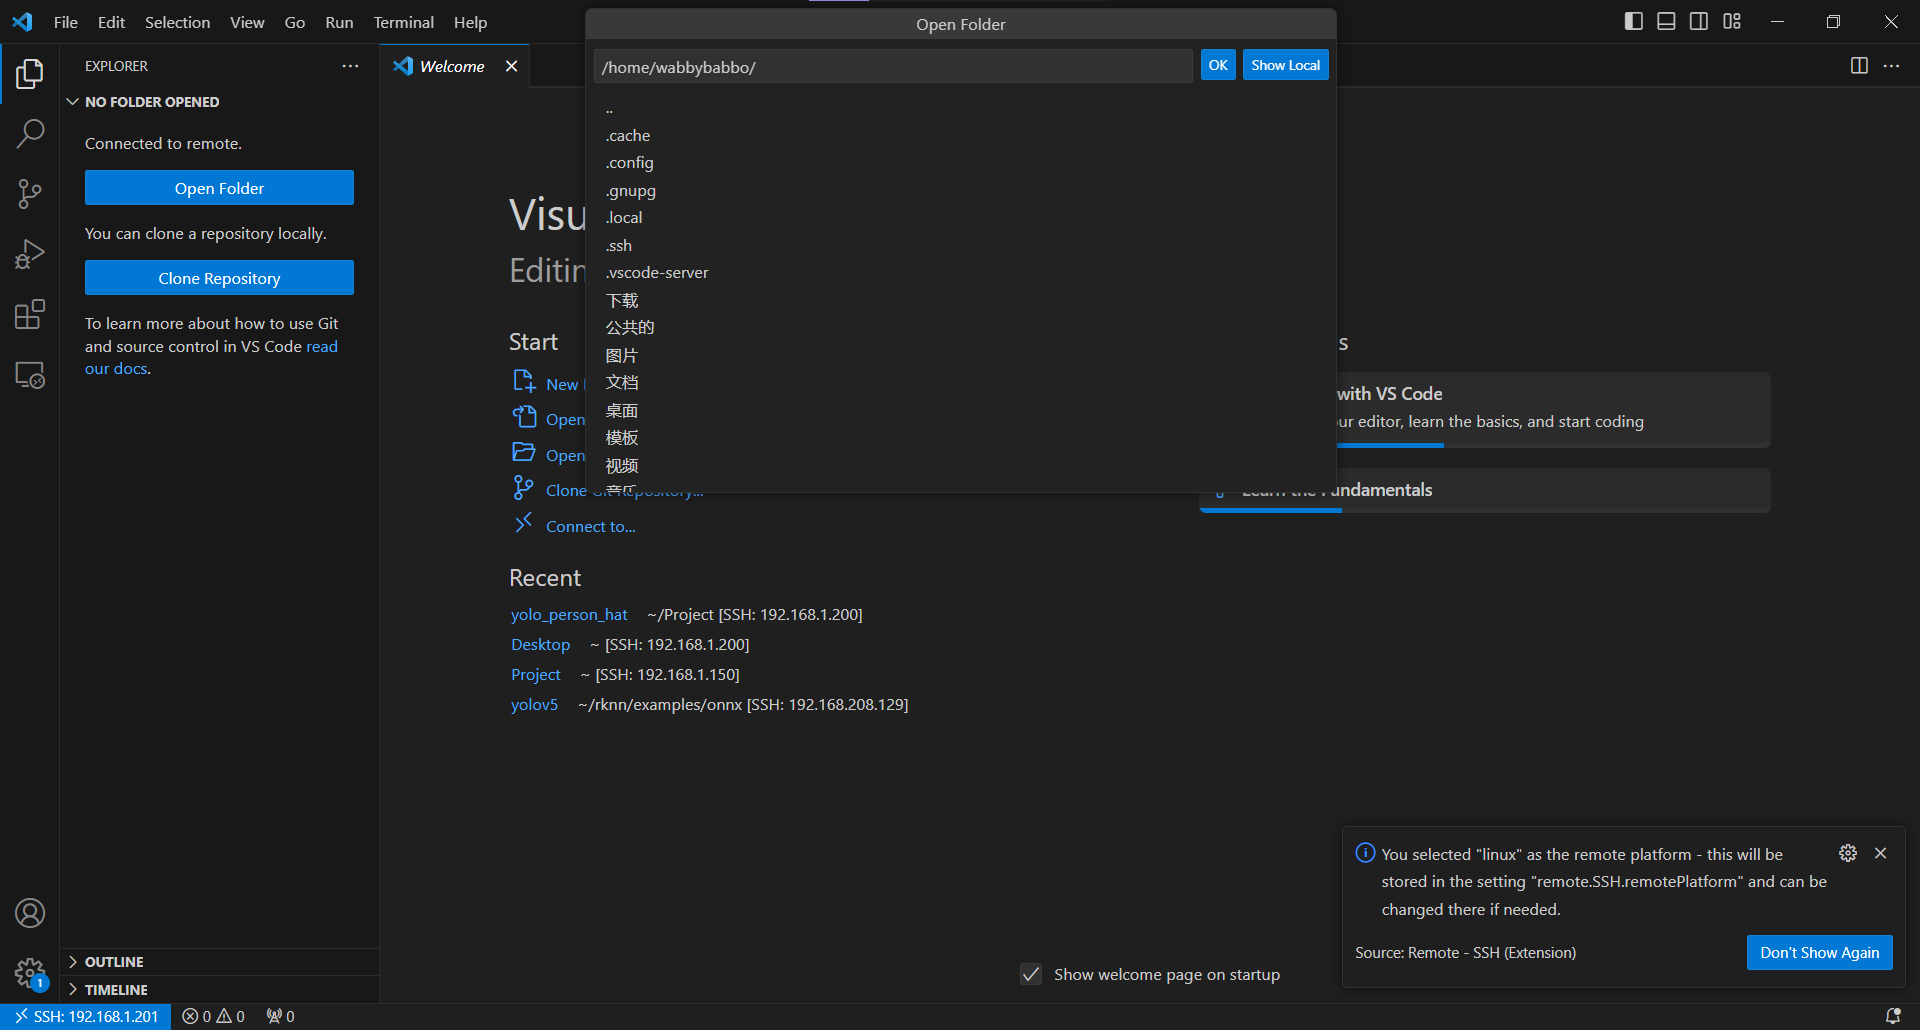
- 烧录成功后,通过上面两种办法知道香橙派的ip地址(如果是用显示屏的,在官方文档里查阅“设置静态IP地址的方法”),我自己的修改为了192.168.1.201,如下图所示,用自己的电脑ping一下香橙派
- Download and install libmali-g610.so
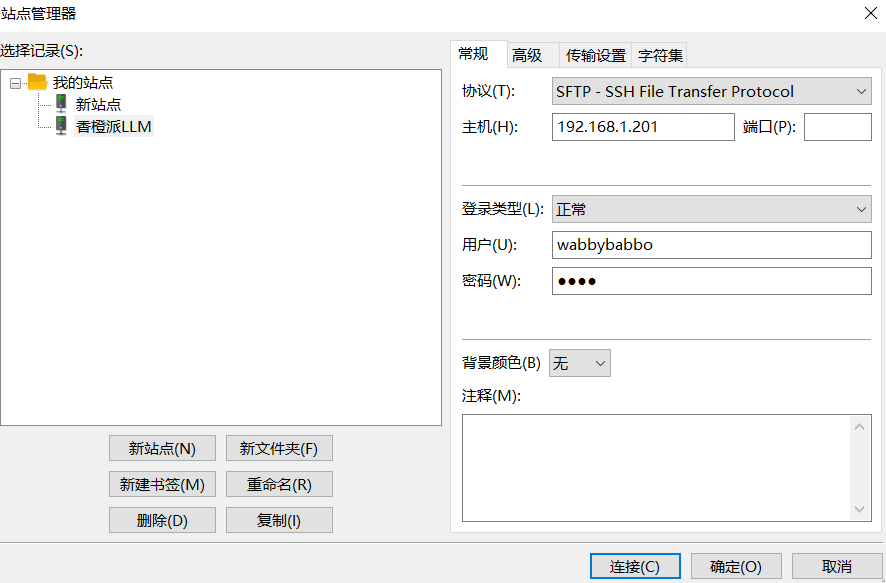
cd /usr/lib && sudo wget https://github.com/JeffyCN/mirrors/raw/libmali/lib/aarch64-linux-gnu/libmali-valhall-g610-g6p0-x11-wayland-gbm.so- 我的香橙派无法访问github,于是采用主机下载文件后用FileZilla传输文件到虚拟机上,用了之前方法但是显示无法连接

- 更改协议后连接成功,协议如下图所示
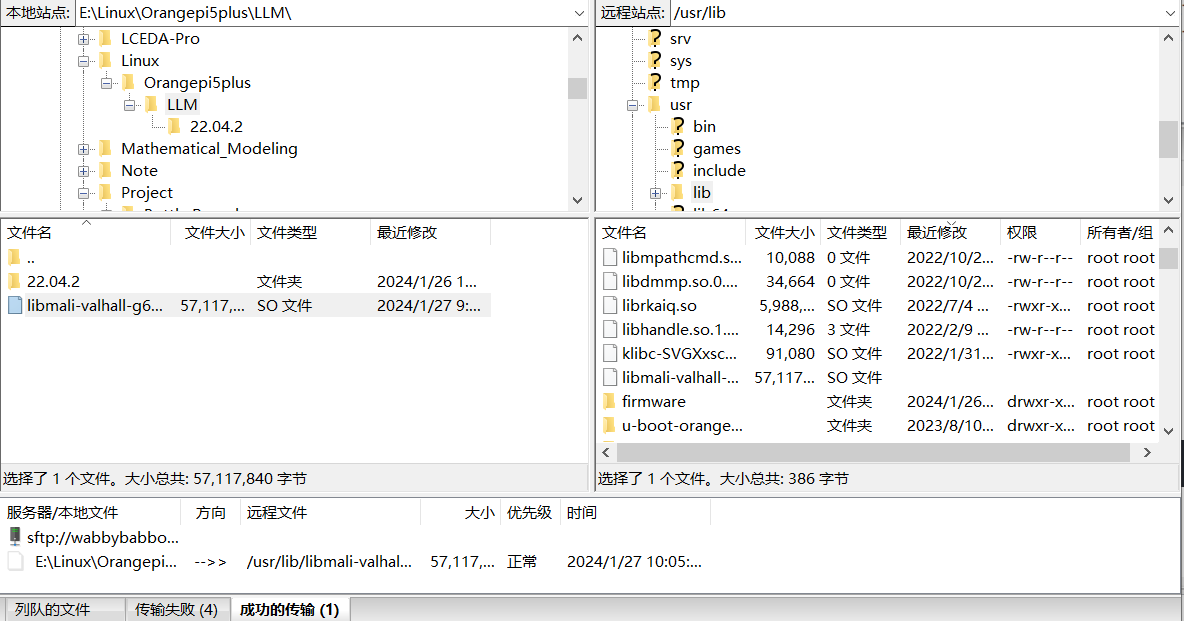
- 在主机上点击网站找到libmali-valhall-g610-g6p0-x11-wayland-gbm.so并下载
- FileZilla出现“无法启动传输”字样

- 原因:文件权限不足
- 解决:修改远程站点文件的权限
sudo chmod -R 777 文件名
- Check if file mali_csffw.bin exist under path /lib/firmware, if not download it with command:
cd /lib/firmware && sudo wget https://github.com/JeffyCN/mirrors/raw/libmali/firmware/g610/mali_csffw.bin我找到了这个文件所以就不用下载了,文件下载处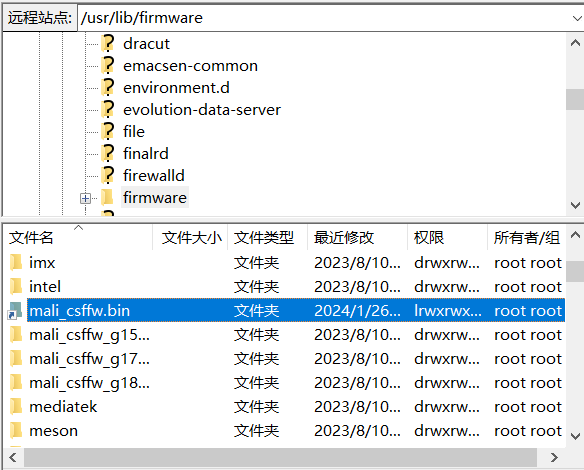
- Download OpenCL ICD loader and manually add libmali to ICD
sudo apt update
sudo apt install mesa-opencl-icd
sudo mkdir -p /etc/OpenCL/vendors
echo "/usr/lib/libmali-valhall-g610-g6p0-x11-wayland-gbm.so" | sudo tee /etc/OpenCL/vendors/mali.icd
1.2 Validata Installation
clinfo1.3 Prepare
# clone mlc-llm from GitHub
git clone --recursive https://github.com/mlc-ai/mlc-llm.git && cd mlc-llm
# Download prebuilt weights and libs
git lfs install
mkdir -p dist/prebuilt && cd dist/prebuilt
git clone https://github.com/mlc-ai/binary-mlc-llm-libs.git lib
git clone https://huggingface.co/mlc-ai/mlc-chat-RedPajama-INCITE-Chat-3B-v1-q4f16_1
cd ../../..
我采用在本地拉取后再传输到香橙派上,建议是先压缩再传输,再在香橙派上解压(.zip)
在第一步git clone --recursive https://github.com/mlc-ai/mlc-llm.git && cd mlc-llm如果遇到这个443问题,点击链接
git config --global http.proxy 127.0.0.1:7890
git config --global https.proxy 127.0.0.1:7890
# 注意7890要改成自己的电脑上的
git clone --recursive https://github.com/mlc-ai/mlc-llm.git && cd mlc-llmgit lfs install在这一步之前先installgit-lfs
sudo apt-get install git-lfs👇在宿主机中创建文件并进入文件
👇会直接在你(主机)选中的目录下(我这里的是mlc-llm)下有一个lib文件
将主机中的lib压缩后拖进宿主机的lib文件下
👇在宿主机中cd到lib并将刚才的压缩包解压缩
unzip FileName.zip # 解压
RedPajama-INCITE-Chat-3B-v1-q4f16_1:https://huggingface.co/togethercomputer/RedPajama-INCITE-Chat-3B-v1
Llama-2-7b-chat-hf-q4f16_1:https://huggingface.co/mlc-ai/mlc-chat-Llama-2-7b-chat-hf-q4f16_1
Llama-2-13b-chat-hf-q4f16_1:https://huggingface.co/mlc-ai/mlc-chat-Llama-2-13b-chat-hf-q4f16_1
git clone https://huggingface.co/mlc-ai/mlc-chat-Llama-2-13b-chat-hf-q4f16_1👆在主机上下载(注意这个网址取决于你用什么来作为模型),下载完毕后采用👇命令传输到香橙派上,好处是可以看到传输的过程(这个文件有13多个G)
scp -r ./mlc-chat-Llama-2-13b-chat-hf-q4f16_1 orangepi@192.168.1.202:/home/orangepi/Project/MLC-LLM/dist/prebuitscp -r 相对路径下需要传输的文件 主机名@ip:被传输文件的目的文件2 Try out the CLI
cd mlc-llm/
# create build directory
mkdir -p build && cd build
# generate build configuration
python3 ../cmake/gen_cmake_config.py
# build `mlc_chat_cli`
cmake .. && cmake --build . --parallel $(nproc) && cd ..
python3 ../cmake/gen_cmake_config.py👆这一步中,CUDA、Vulkan、ROCm、Metal全选n,其余选y
cmake .. && cmake --build . --parallel $(nproc) && cd ..👆在这一步可能会报两次错
sudo apt install cmake还有一个报错没找到图,大概意思是找不到cargo,install一个就好👇
sudo apt install cargo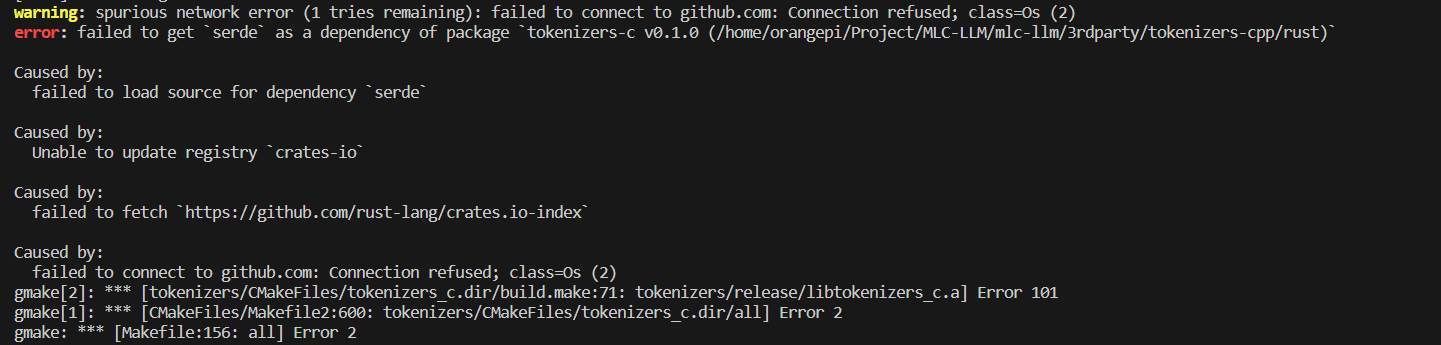
解决方法更换Cargo软件源
vim $HOME/.cargo/config👆我的是新建的一个文件
# 中科大
[source.crates-io]
registry = "https://github.com/rust-lang/crates.io-index"
replace-with = 'ustc'
[source.ustc]
registry = "git://mirrors.ustc.edu.cn/crates.io-index"
再次执行👇可以看到有后续的进度
cmake .. && cmake --build . --parallel $(nproc) && cd ..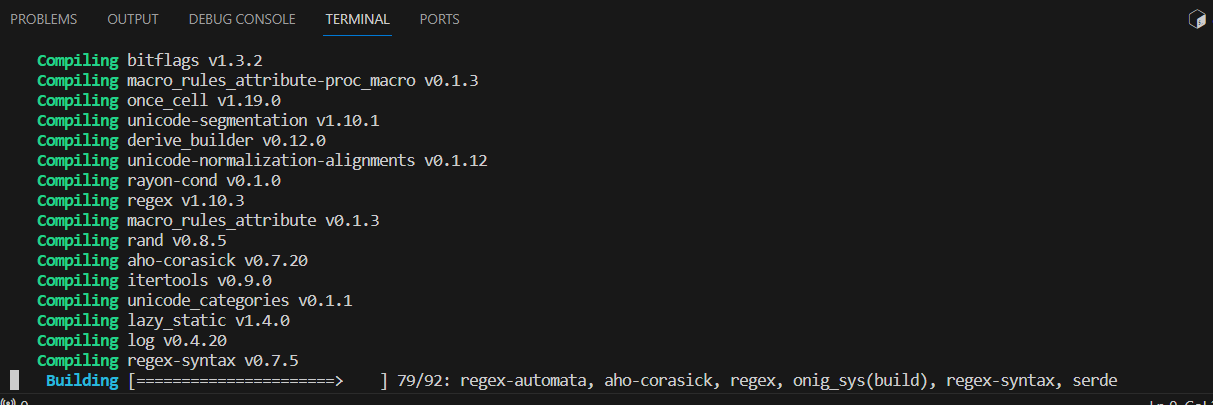
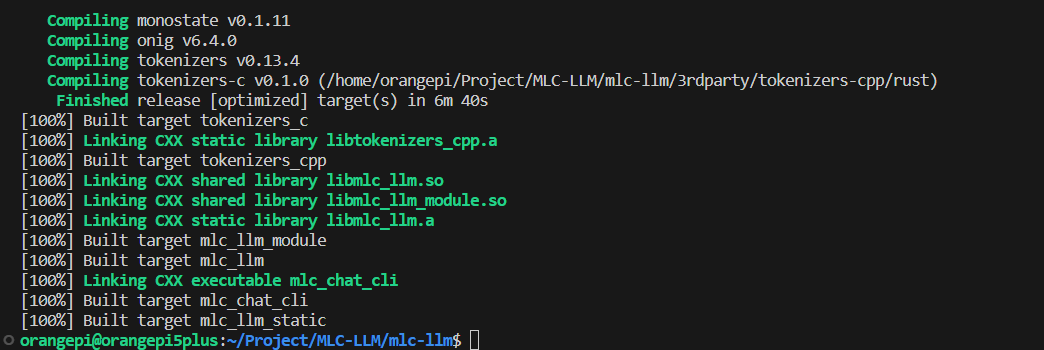
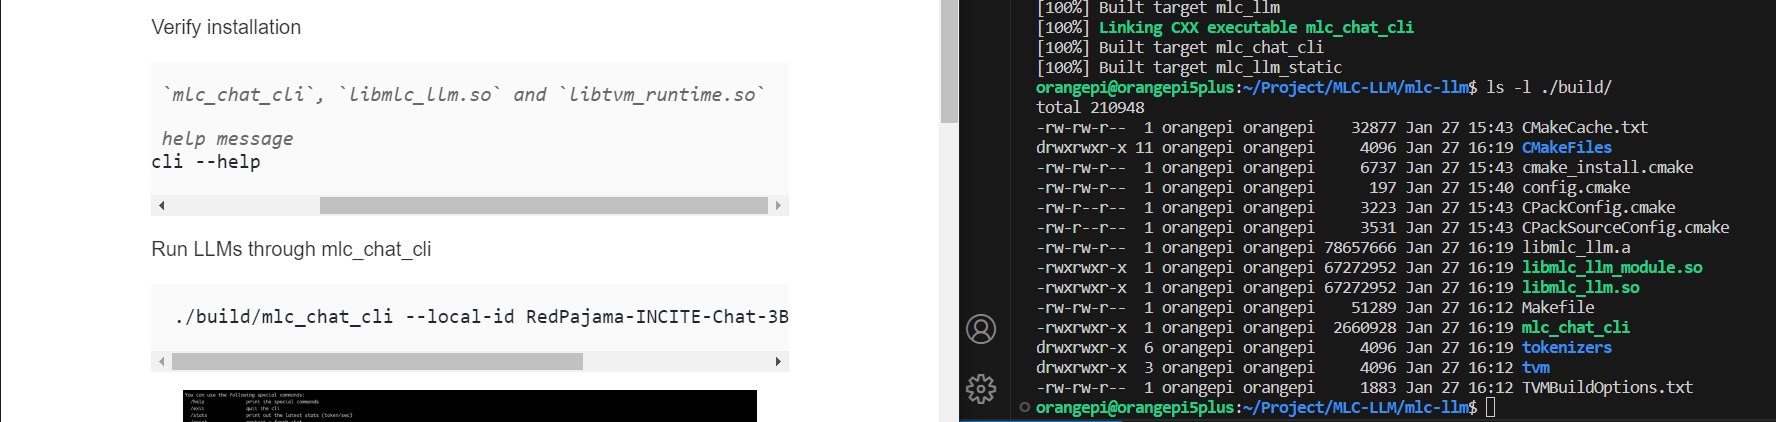
👆这一步是让我们看是否有三个文件,分别对应右图中绿色的三个
./build/mlc_chat_cli --model Llama-2-13b-chat-hf-q4f16_1 –device mali报错:找不到mlc-chat-config.json
解决问题Github——Cannot find “mlc-chat-config.json” in path “”dist”/RedPajama-INCITE-Chat-3B-v1-q4f16_1:
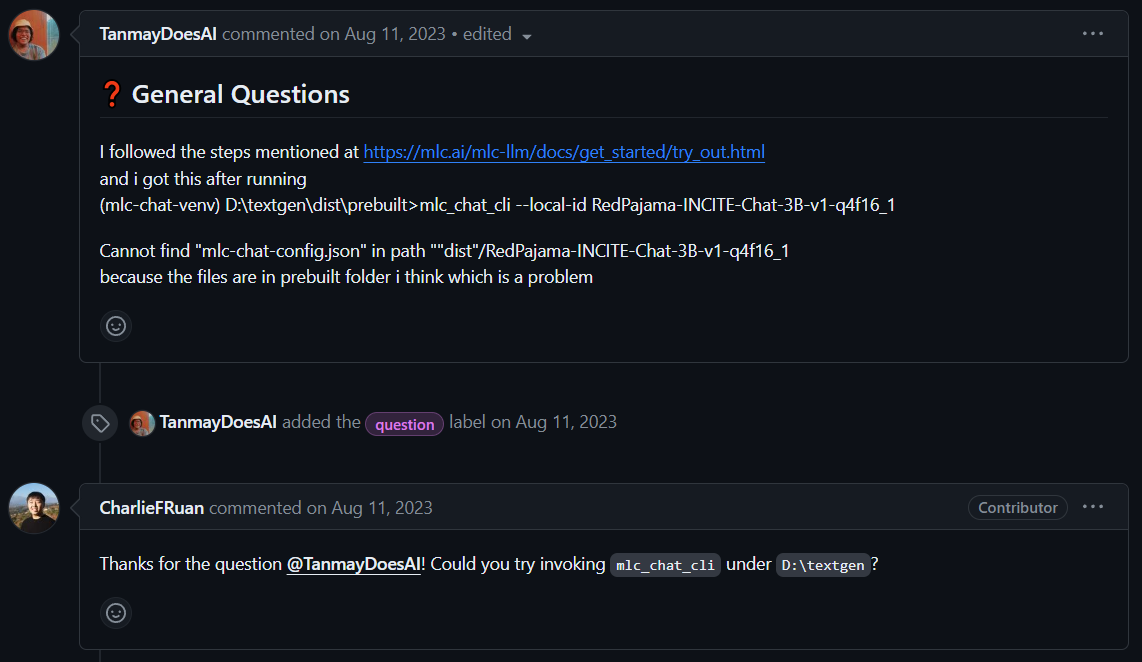

原因:mlc-chat-config.json在mlc-llm的上一级文件里的mlc-chat-Llama-2-13b-chat-hf-q4f16_1文件中,一开始是在mlc-llm中bulid中运行,因为无法调用/访问mlc-llm的同级文件所以报错。所以换成MLC-LLM来调用mlc_chat_cli,即dist的上一级
大功告成!